Hey, Pilot here!
To set this up you’ll need to navigate to Tiltify.com and access your campaign page.
From there on the sidebar you’ll find the Branding page, click that. Once loaded you’ll
see the Overlays option, click that! Once there, you’re going to want to click Add Overlay or edit an existing one if you have one.
Once you do that, you’ll be taken to your overlay design page. Navigate to the left of the page and delete the Classic Overlay widget, and any others you don’t need. You’ll want to move the Event List widget to somewhere else if you’re not deleting it.
Now select Add Widget and from the selection look for Dynamic Text, add that then follow the parameters listed in the Dynamic Text Widget Parameters file in the .zip file you downloaded.
Repeat the process for the Custom Progress Bar Widget using the named file in the .zip folder but also include these two colours:
Progress background colour: ■ #FFF8A6
Progress foreground colour: ■ #FFC600
Your overlay should resemble the image file “Tiltify Should Look Like This” in the .zip folder.
If you didn’t choose to delete other widgets yours will look slightly different, but what’s important is the Text and Progress bar matching the image.
You are now free to play around with any other widgets you like! We recommend customising the Alert Box widget to suit your style and vibe! Once finished click Save Changes in the top right corner, then click Copy Overlay url.
Now please install the font file “BebasNeue Bold” included in the .zip folder. Do this BEFORE opening OBS. If you already have OBS open, please close it completely, install the file, then reopen.
Open up OBS now and add an Image source, name this “BCFT Overlay” and click OK. Click Browse and navigate to the file “Overlay File For OBS” and click OK. The blank Overlay without any text will now be visible on your OBS screen.
To add the text and progress bar, add a Browser Source. If you can’t find that please refer to the file “Add Browser Source” in the .zip folder. Name it Tiltify and click OK. Paste the url you copied from Tiltify into the URL bar. Set the Width to 1920 and the Height to 1920.
Click Ok, and you’ll see the text and progress bar (and any other widgets you’ve chosen to use) appear on your OBS screen!
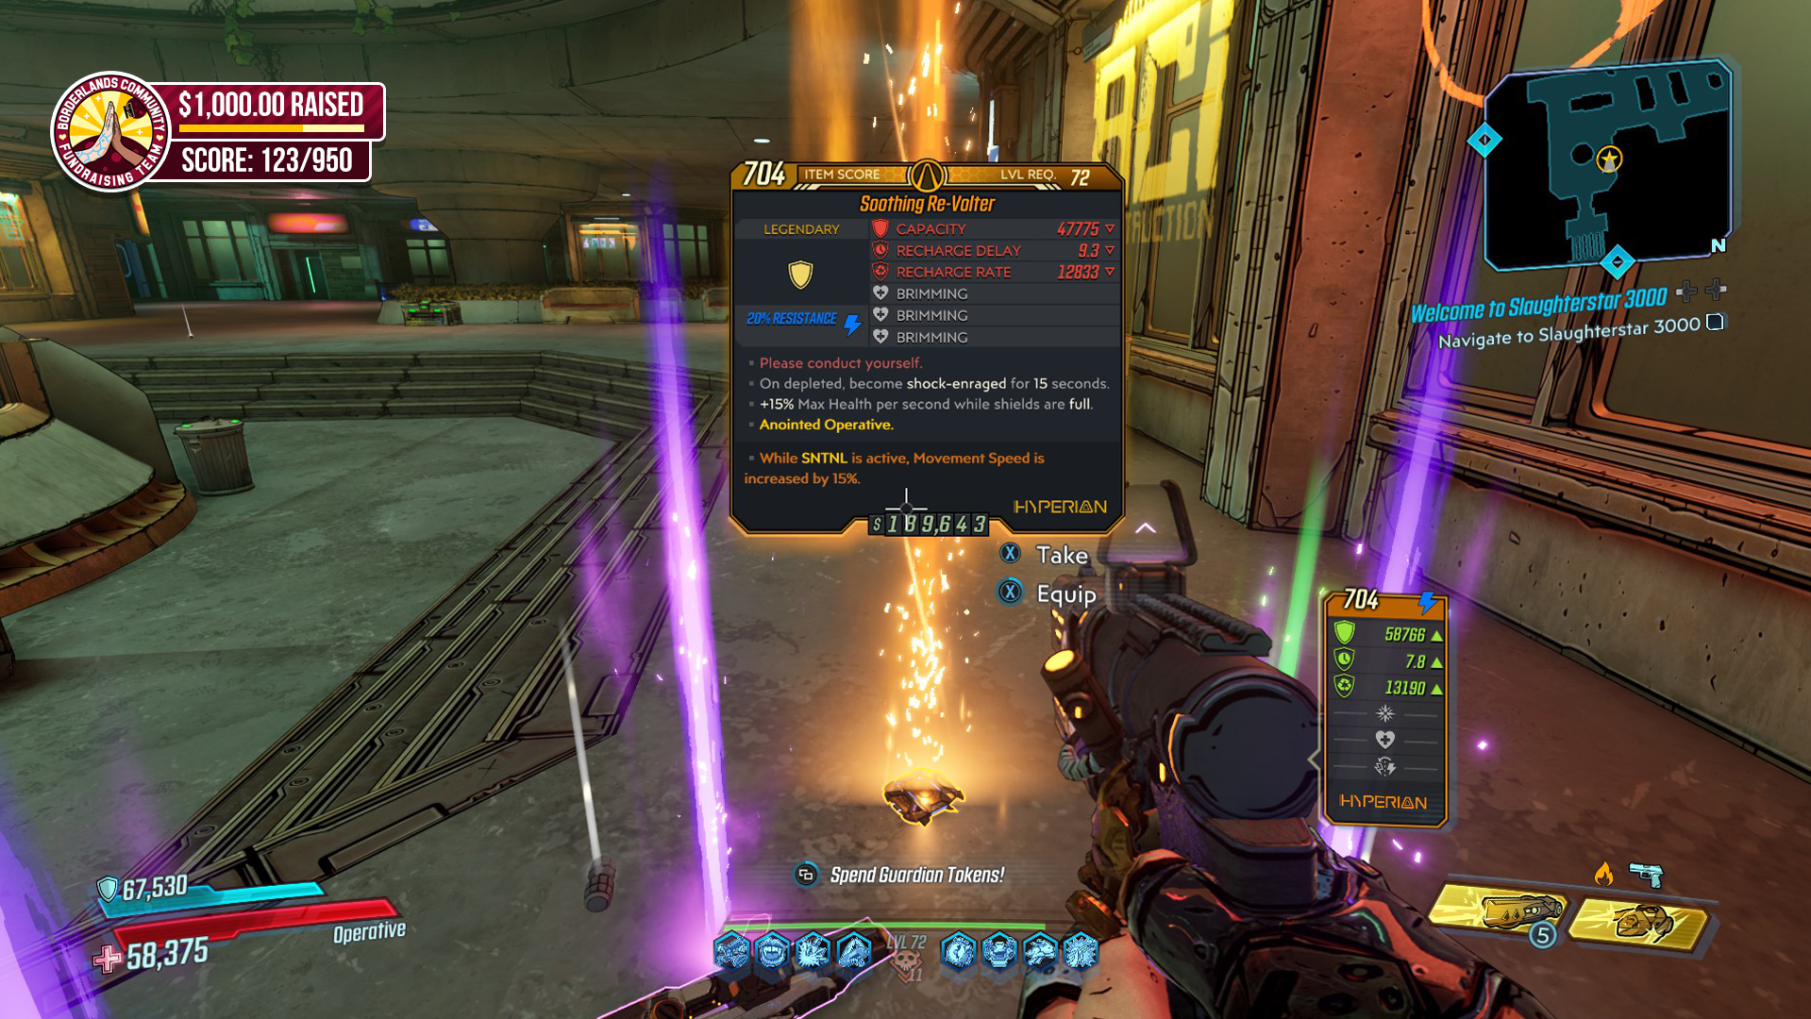
To add the Hunt Score, add a “Text” or “Text (GDI+)” Source. In there Type “Score: 000/950” in the text box. Now click Select Font. Choose Bebas Neue Bold and Size 36. Click Ok to close the Pick A Font window. You’ll want the font colour to be #ffffff (White) which it should be by default.
Click OK. Now click and drag the red box surrounding the text and position it on top of the Overlay Image matching how it looks in the Overlay Example file in the .zip folder.
You are now ready to go! Please note you can play around with the text as you see fit, this guide is just to give you the best option we suggest! For example, some people like to have the Score not feature any words and just have numbers.
If you have any problems, jump in our Discord and we can help! – https://discord.gg/dAFM9HH5Kv